Nikon’s highest precision automated video measuring system is the “Master Reference Measuring System” for your metrology lab. Nikon’s highest precision automated vision system, the NEXIV VMR-H3030, has the best specifications, accuracy and repeatability of any NEXIV measuring system, with a minimum readout down to 0.01 µm. It features a 300 x 300 x 150mm stage, TTL Laser height/profile scanning, intelligent pattern recognition and low contrast edge measuring. Perfect when exceptional accuracy is critical, such as calibration of standards and gages, master dies and molds and difficult to measure or ultra-small precision parts.
Categories: Vision Systems
Applications: Surface Examination, Surface Analysis, Powertrain Components, Mobile phones, shavers & watches , Automated measurement, Telescope optics, Antennae, Telecom & Electronics
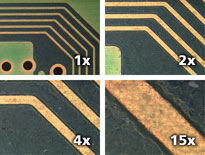
Ultrahigh precision of 0.01µm provides the critical detail necessary for a Master Calibration Instrument. The H3030 features a powerful telecentric 15:1 zoom module with 0.35 NA objective and 50mm free working distance.

Conceived and designed for the purpose of sub-micron precision measurement, the VMR-H3030 is massive (3x heavier than the equivalent VMR-3020). The stage is constructed of low coefficient of expansion metal with extra heavy duty roller bearing ways. Special high resolution linear encoder scales (with low coefficient of expansion glass scales) provide read-outs that are 10x finer than our other Nexiv Measuring Systems.
Allows users to fully utilize the powerful optics to scan at 1,000 points per second on complex profiles of 3D precision parts and a 15X Telecentric Zoom System that facilitates easy searches at low magnifications.
Black and gray portions of a workpiece are digitally classified into 256 levels, then edges are detected and processed based on this classification. This prevents measurement data from being affected by changes in illumination.
When the operator clicks the point to be measured, the system automatically rotates the probes, sets them at the optimum position, and sets the probe size automatically. Desired edges are easily selected by eliminating dust and burrs through a change in the contrast threshold level. Unique algorithms enhance edge detection, even at low magnifications.
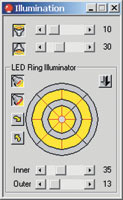
A variety of illumination choices facilitate accurate edge detection in dies and molds. These include:

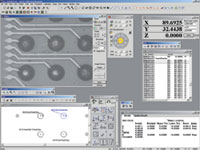
Features interactive measurement wizards, which can be customized by each operator for future use. Intelligent search functions eliminate possible measurement errors and a multi-pattern search function automatically corrects part-to-part variation along with deviations in expected edge or feature locations. NEXIV also features a pattern matching measurement system that determines coordinate values for features too difficult to measure in the normal geometric measuring mode.

For superior stability in any environment with stage rail designs normally seen on high-end machine tools.
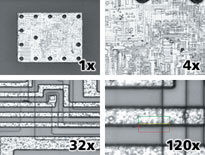
Offers even greater precision, providing optical magnification to 120x. Ideal for wafer level CSP, wafer bump height and SIP, rerouted masks and masks for MEMS. Other features:
